The North Side - A Summer-Long Project
Windows, Doors and More
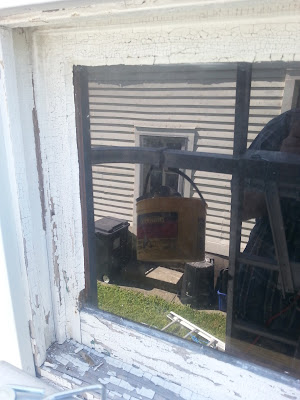
The north side of 173 had really begun to show its age - heck, begun? Back in 2013 I was bemoaning the north side of 173! Wood was getting punky in places, the stoop was so worn out that when I ran my hand across it by accident, I ended up with lacerations! And the foundation surface had really gotten bad, there was mildew and moss, and the concrete was crumbling. As the summer began I figured I needed to get out there and get started. The first thing was the window that is actually at the landing of the stairwell. Time and weather had pretty much done it in, the sill was worn, the window putty had long since crumbled, and the window frame was almost to a really bad point:Some windows at 173 would just look plain ol' stupid if there were shutters on it. These windows will instead have the framing painted black. After stripping, glazing, priming and painting here's how the window turned out:
The upstairs windows will eventually get shutters. After standing back and admiring my handiwork, I really started noticing all the wood and concrete issues.
A: A portion of the door frame had rotted out.
B: I dug a shallow trench and some of the concrete was crumbling in large sections.
C: Some of the crumbling constituted large, deep holes.
D. That horrible stoop!
Starting with the door-frame, after removing the rotted wood, I spliced in some pressure-treated pieces, including a gap behind the sill.
Once all that was done, I covered it with a piece of thin vinyl board. As it turned out, both sides of the door needed pretty much the same treatment.
Then it was time for the foundation concrete. It's funny how over time one just doesn't notice how bad things can get. Some of the holes along the length of the wall were as much as 5" deep! In those holes I used some wire to give something to hold the concrete together. Outside of that, I cleaned the walls really good, then applied some Quickcrete Bonding Adhesive and then just got going on applying new cement.
Of course, all that work and digging really tore up the ground, so I started fixing that as I went along. Here's a shot of the resurfaced foundation, and the beginning of fixing the ground around the foundation:
Time for the stoop. That stoop. Perfect name for it - stoop. It took quite a bit of figuring to finally decide on the approach to fixing it. I considered resurfacing it, but after lots of internet searching, decided against that. I also thought about taking it out altogether and building a (very) small deck-type stoop.
In the end I decided to build over it. I'm not sure how it's going to work out in the long run, but I thought it was worth a try. I used pressure-treated lumber and TapCon screws and built right over the concrete.
And here it is:
Here you can see the shade garden in the background. It's mostly a variety of hostas and ferns. By next summer it'll grow in full! Here's a shot a little closer:

And finally, a long shot of the whole side:
So you can see, the upstairs windows need shutters, and at some point I'm going to replace the kitchen windows, but for now, the north side of 173 is done! Just for fun, here are some bonus pictures:
 |
| The concrete just kept coming off! |
 |
| Mid-project |
 |
| You can see the mess I made in the shade garden |
 |
| Shade garden rehab'ed |


