The Kitchen - Part 2: Ceiling
New Kitchen Ceiling - Harder Than You'd Think
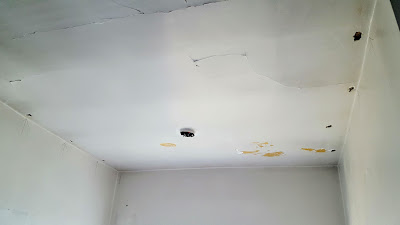
When last we met, the kitchen ceiling was old and cracked, and maybe even close to falling in. I think it's likely the original ceiling from 1927 and it looked like this:The thing is, the beadboard was so heavy, it had to be cut in half to make installation even possible. I'll tell you - that was a tough day!


Our fondest memories are made gathered around the table with family and friends. - Author Unknown

All of which meant the seams would need to be covered. At first I was really disappointed with the idea, but as you'll see when this is all done - it turned out to be okay because it added a nice architectural interest to the ceiling.
There's probably an easier or better, more professional way to make sure the boards lined up - but I couldn't think of one! Here's one last look at the old ceiling - buh bye!
So, that's the ceiling until the reveal. It came out quite nice, but to be honest pulling it down and putting up a new ceiling would have been a thousand times easier. Because of the plaster-and-lathe and the weight of the panels, I had to use toggle bolts (look closely at the pictures) to make the panels flush with the ceiling. These things worked great:
Next up: The walls!


