Radiator Cover Bonus Progress Pics
Off the Cutting Room Floor
I was looking through the progress pictures from the radiator cover and thought maybe it'd be fun to show some of the less-than-glamorous shots taken along the way. We'll start with the new Kreg jig that really motivated me to get this project under way! Here it is with the vacuum attached...
I know that's not very exciting but I love the Kreg jigs, so much so that I painted my old, beat up metal toolbox just to gussy it up for my Kreg tools...
Of course the new jig doesn't fit, but it's perfect for the rest of the jigs and supplies...
Anyway, after the stiles were cut, I used the 1/4" roundover router bit to cut a profile into the outer edges of the end stiles. This will give them a bit of architectural interest, which will really show when the glazing is done.
And here's the radiator cover face frame in its very early stages.
This was the first project where I really started to appreciate all the features of my new sliding miter saw! If you look closely at the top of this board, you'll notice the flange that pivots from the saw's support arms making repeated cuts sooo much easier!
I also learned how to effectively use the built-in clamps, as well as how nice having a sliding miter saw is - as opposed to my old chop saw.
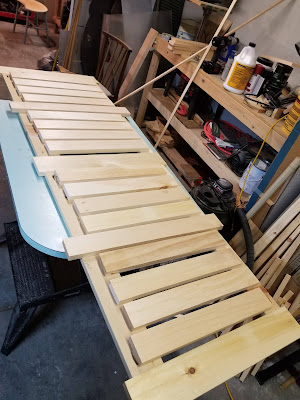
I spent a couple hours just trying to figure out the requisite number of slats, and the proper spacing:
Who would have thought putting in slats would be so complicated! Of course, I probably overthought it.
Then there was the old 173 board I had saved a fews years back. This was the only board I had with the perfect thickness for the plinth to carry the fleur-de-lis...
The feel and beauty of finely crafted wood…the refreshing smell of your workshop…the absorbing joy of cutting and joining that makes the hours race by… These are the reasons you love woodworking. - Jack Neff
So I free-handed a couple plinths, but couldn't quite get the angles the same on both sides.
And I got close once...
Then it dawned on me! I used a stop block on the miter saw!
And ended up with a pretty nice plinth!
So, that was just a few bonus shots just to tide me over 'til after the holidays when I can finish the project once and for all! In the meantime, another picture of where we are at this point...
Getting there!


