Tool Storage and the Tool Board
Renewal Long Past Due
There has always been a board on the south wall of the workshop. I say "always" although I don't know that for a fact. You see, the house was built for the Moshers back in 1927, which was long before me, and now that I think of it - predates mom and dad too! So, while I wasn't around since the beginning, a close inspection of the board shows it's old and been there a long time. Right up my alley!
My Rationale
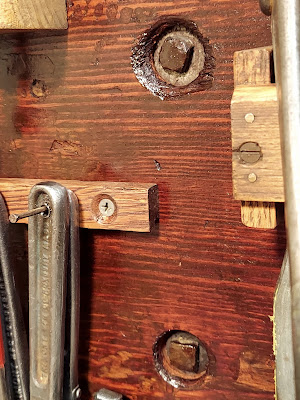
In my consideration of old-board versus young-board (let me know if you get the droll reference there) I have a couple points of consideration - age of the board, and the bolts affixing it to the wall. First, close inspection of the board, the growth rings on the end grain were really close, telling me this was an old-growth board. Not only that, there wasn't the least bit of bow or twist in this board. My other piece of evidence is that the board is affixed to the concrete wall with very large lag screws with a well-aged patina on their heads. So, I've come to the conclusion that the board has been on this wall in the workshop for much longer than 25 years.
In case you don't know, wood moves. It expands when it’s wet and shrinks when it’s dry. Wood movement can lead to the opening of the joints, chipping of the finishing, and several other quality issues. Nevertheless, old growth lumber does not move as the growth rings are tightly packed. This is a significant property of old growth wood. - Urban Wood Goods
Why Clean Up the Board?
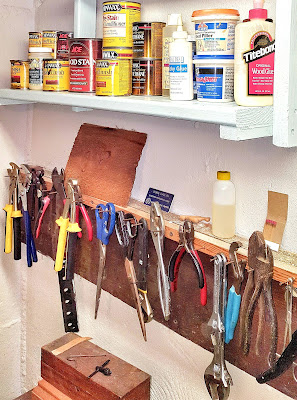
I don't know. I mean, for all these years I just took the board for granted. I had tools and little odd-and-ends on it, but aside from that, I just never gave it much thought. Until recently. In September, I refurbished a pair of Wards Linesman Pliers. Once they were all cleaned up I realized it was time to revamp my plier storage, so I made a pliers rack. At that point I had to remove this magnetic strip, which was handy but very limiting in the number of tools it could hold.
Also, if you look closely at that picture, you'll notice two things: 1 - there were a lot of holes in the board. For years whenever I wanted to hang another tool, or rearrange the board, I just put in new screws, and quite frankly I think Mr. Mosher did the same thing. The board kind of looked like New York roads - full of holes. The other thing you might be able to see is that the board is dirty. Sure, you might think the color is a rich brown, and you'd be right. But that rich brown is hidden behind a patina of dirt and grime. Clearly time for a cleanup!
Tool Storage Pieces
With cleaning up the storage board, I wanted to also reconfigure the tool storage. And of course, I would have to do it with scrap wood because - you know...
The Old Ones
Way back in about '98-ish, German relatives came over to help put in a new basement floor. It was at that point that we also made the work bench. We also made the tool storage below, that included a couple strips of wood with a bunch of finish nails for hanging tools. It wasn't fancy but it worked for a couple decades...
Two Pliers Racks
Like I said, I had already made a pliers rack when I restored the Wards linesman pliers, but now I wanted another, so - same design:
A Nut Driver Rack
I had also made a rack for the nut drivers I put together back in August. It's clearly of the simplest design, with the fanciest features being the driver size written on the front of the board, and the fact that it's affixed to the storage board with pocket screws.
The Wrench Rack
I liked the original tool-hanging setup, so I took this opportunity to upgrade and repeat. Basically, I had a scrap piece of oak that I culled from an old piece of furniture I snatched from the curbside just for the beautiful wood which I knew I could find a use for. I dismantled that old piece, so now I have some great oak planks hanging around for just such an occasion as this! I took the same approach as the original hanger, and spaced out some finish nails, only this time in oak rather than pine!
With these simple tool storage pieces put together, it was time to get busy on the board itself!
Prep and Stain
And alas, it's time to get down to it. The first thing I did was to fill as many of the old screw holes with pieces of variously-sized dowel, and in a couple instances with pieces of toothpick. After that I started covering each with a little wood filler until I realized that would take forever, so I started putting on the filler in broader swaths...
From there I ran the orbital sander over it for a couple minutes, then did just a bit of hand sanding. In this picture you can really see where all the little holes were:
There really weren't a lot of options for a stain color. But this was okay because I really wanted the board to look similar to how it used to look, only clean and with fewer holes! And I gotta say, I've absolutely fallen in love with gel stains.
Like anything else, there are pros and cons, but for most of the projects I do, it makes staining so much easier and more consistent. The mahogany color would make for an excellent choice!
As you can see, it didn't turn out perfect, but I wanted the board to still show some of its time-worn character, and I think it worked out well! I also put on a coat of clear shellac. Not so much for a beautiful finish, but just to even out the look...
Barry Kripke: You all wight there, Cooper?
Sheldon Cooper: Not really. I feel somewhat like an inverse tangent function at the approach to the asymptote.
Barry Kripke: Are you saying you're stuck?
Sheldon Cooper: What part of 'inverse tangent function approaching an asymptote' did you not understand? - The Big Bang Theory
Et Voila!
After thinking through the positioning, it was just a matter of affixing the storage pieces to the board. It's funny to think that a grown man could get so excited about such a simple thing! So, let's break it down a little.
The Right Side
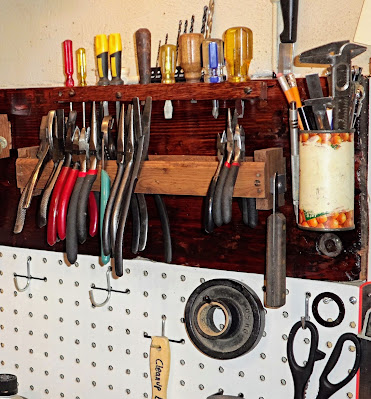
I planned out placement of the tools on the board based on my work patterns at the work bench. On the right side went the screwdriver rack, which we'll talk about more in just a bit. Along with that rack went one of the pliers racks, and this is where the small to medium sized pliers went. I also put the pencil can on the right, almost exactly where it's always been...
The Middle
In the middle went the rack for the larger pliers. These pliers are the workhorses in the shop, so they're dead ahead of me when I'm working at the bench.
The Left Side
And finally, on the left went those tools I wanted close at hand, but aren't used as often. That included the nut drivers and my small collection of small monkey wrenches...

Honoring the Past
All that being done, you'd think I was finished here - right? Well of course not! I just want to mention of couple things I did, mostly just to remember the guy who loved this workshop before me - Mr. Mosher. Obviously, the board itself is a bit of an homage considering I wanted to maintain its used look. But here's a couple other things...
Small Screwdriver Holder
The screwdriver rack had been on the board for decades, and probably several decades before me, and was clearly homemade by what I would presume to be Mr. Mosher. You can tell it's old just by how it looks in this picture:
I definitely didn't want to replace it just for the sake of replacing it, so I ran it through my disc sander, stained it, and it was like new. Turns out, it was made from a piece of oak!
The Catholic Medallions
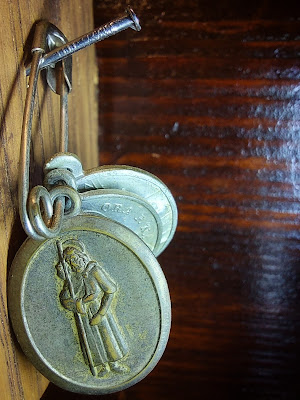
So here's a neat little thing. Since the very first time I walked into the workshop back in '97, there has been a little safety pin holding three little Catholic medallions hanging from a nail. Here you can see them in this old picture that I had to blow up, so pardon the picture quality...
They'd always just been there, so when I finished this little project, I thought it was only right to let them have a new place just north of their old spot....
Here's a closer look...
Just thought it was kinda neat.
The Shoeshine Opener
Here's a little trinket that was on the board from the beginning. It's a boot polish can opener, I've never seen such a thing before. A quick look on the web shows that Kelly's is still making shoe polish. I ran it through the wire disc on the bench grinder and cleaned it up a bit. It now hangs on the same nail on with the Catholic medallions.
Here's a fascinating, and sadly shameful, story about these little pieces: Freedom's tally: An African American business in the Jim Crow South by Jay Driskell, October 18, 2016
Pencil/Brush Holder
The first thing to point out is the little fruit can that holds pens, pencils, brushes and a small tool or two. Mr. Mosher had painted a number of used cans and labeled them for whatever he was storing in them. This can has been on the tool board since before '97!
I also want to point out that next to the can, I attached a small magnet to the end of the pliers rack, and that's where I hang the marking knife that I made from an old paring knife. But here's the fun part - at least to me. I never really much considered the origin of my little can. It has always been nothing more than a pencil holder...and I suppose it's still nothing more than an old used can holding pencils. But just for the fun of it, let's take a closer look...
Take a look at the numbers:
1. Points out the corner of a banner on the can.
2. Points out all the oranges in the background.
3. Points to the remnants of a some orange leaves.
4. Mr. Mosher's labeling.
Now take a look at this:
Never mind that someone is actually selling an old Minute Maid can on Ebay or Etsy, or whatever online market this picture is from...this can is an exact match! So, the (ever so recent) mystery of the can's origin has been solved. But adding to the incredible excitement you must be experiencing at the discovery of such an artifact, here's an ad for the selfsame product:
And one final piece to the puzzle:
That's right.. Bing Crosby singing about my pencil can way back in 1954! Okay, I guess the point is - this can has been hanging out at 173 since the 1950s! I know, much ado about nothing, but it's at least a little interesting isn't it? Here's one last shot of this goofy can:
I wish I had a better angle on it, but it says "Picture Hangers". I'm guessing Mr. Mosher grabbed the can off the counter after some Sunday morning brunch because he needed a place to keep...well..picture hangers.
The Board's Natural Habitat
Wow! This post went down all kinds of paths, but sometimes that happens. But if you're still reading - thanks for making it through to the end. And to help you out of this infinite loop, here's the final shot - a peak at the tool board in its natural habitat:
DONE!


